
This is a copy of the recreation that used to be hosted at http://projectspeccy.com/projects/ with permission from Steve SmithBecause of the Spectrum Next, I got interested in Sinclair Spectrums after a long (15-year) break. I have acquired some original models and enjoyed reacquainting myself with the Spectrum system and programming. Although I have a DivIDE and other such interfaces, there’s nothing like nostalgia when you load an original program from tape.
Although I own several Spectrum tapes from the old days, files are available online in TAP and TZX formats that can be played as if you had the original tapes. These are readily loaded into Spectrum emulators but not so easily into the real thing. However, a couple of very clever guys, Duncan Edwards and Andrew Beer devised a device to do just that. The TAP or TZX files are copied onto a Micro SD Card and placed in the device which, via a menu, you can play the files into a real Spectrum machine. The device can be used with several other 8-bit microcomputers, but I will concentrate on the TZXDuino for Sinclair Spectrum.
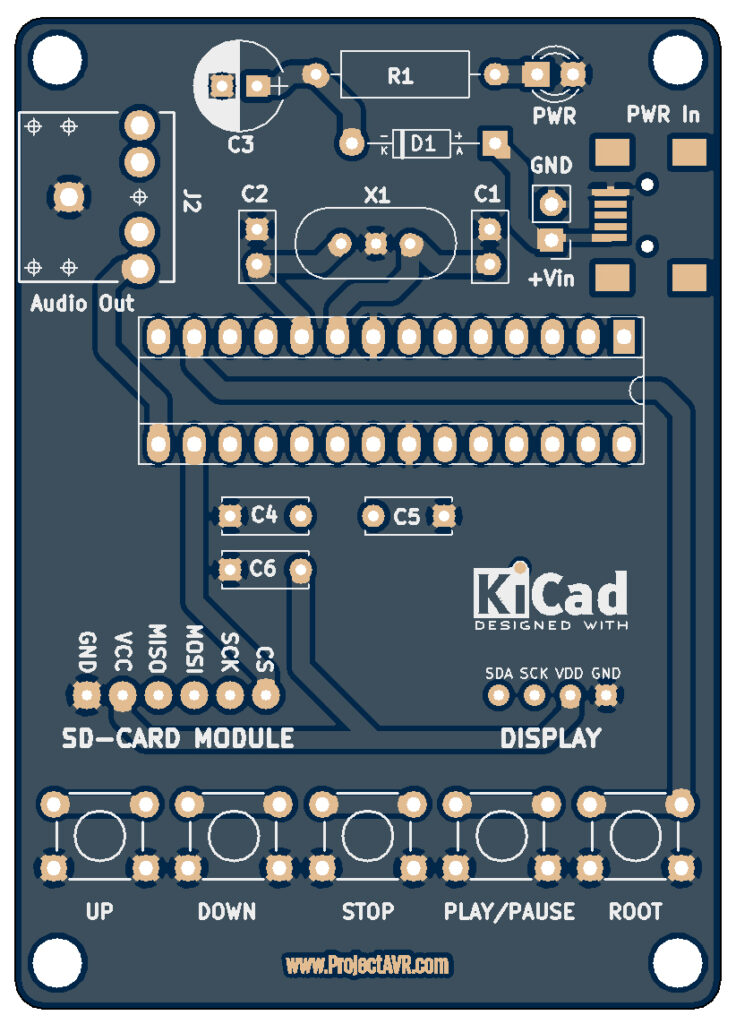
The circuit is fairly simple. An ATMEGA328 is connected via I2C to an SD1306 OLED Display and via SPI to a commonly available Micro SD Card module. Five tact switches are used for selecting the file to play and an audio output is driven directly from pin D9 of the microcontroller. The audio output seems adequate for most files but occasionally fails. I will look into adding a small amplifier to boost the audio.
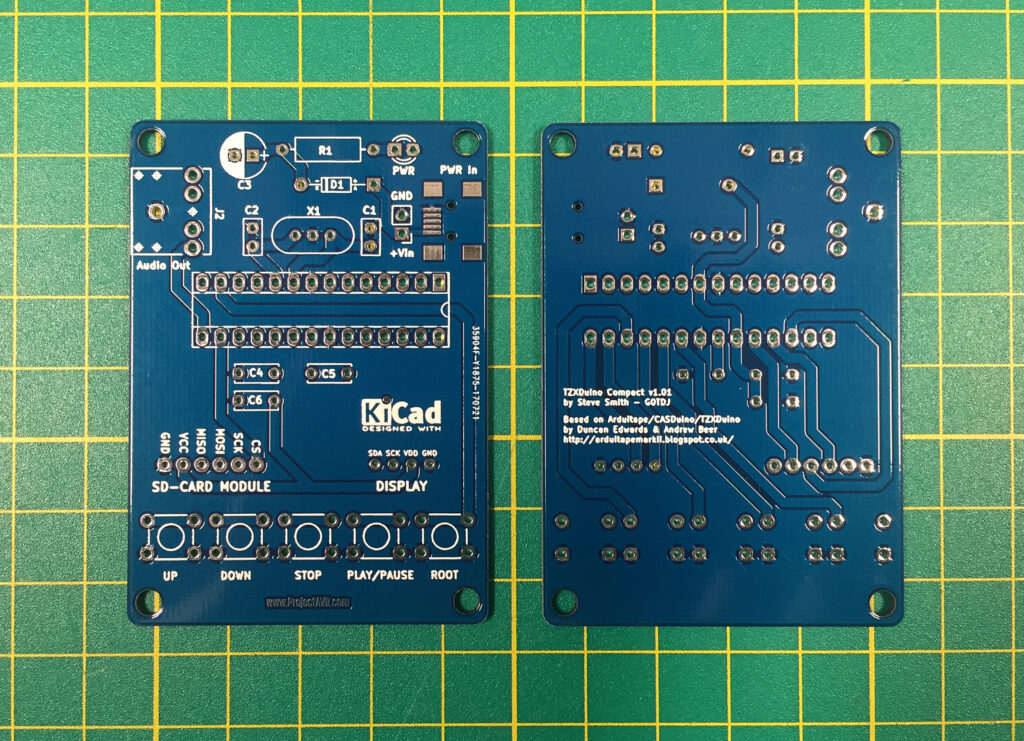
The PCB was designed to be easily mounted in a box with 3.2mm holes in each corner. The display and micro-sd card module sit on the top. I have found it necessary to put a small piece of foam behind each to prevent them from bending towards the components mounted on the PCB.
As usual with building any project, start with the low-profile components first: resistor, diode, crystal, etc. And gradually build up to the higher components. The only tricky part to solder is the USB Mini port; in this application, it is there to supply power. You can use the two header connections directly behind the SMD pads. The diode is for polarity protection.
The SD-Card module I purchased had a straight header already soldered on so it required de-soldering and replacing with a strip facing down, under the board. The display came without a header strip installed so it was an easy case to add one.
Programming the ATMEGA328 is made easier if you have an Arduino Uno. I extracted my Uno’s ATMEGA328 and temporarily installed a new one. I then programmed it with the ICSP header on the Uno’s board. If you have an ATMEGA328 with a bootloader, you can use the USB input as normal. If neither of these options is available, you will need to make a small adaptor board for ICSP programming, use a breadboard or perhaps, use a minDUINO as a base.
All the files necessary for fabricating the TZXDuino Compact can be found here https://github.com/lostretrotapes/TZXDuino-Compact